Securing ISSI data
This server is currently running 2 domains:
jeremyschaub.us: my profiles, demos, blog postsdata.issisuzuki.org: reports for ISSI scheduling
For my site, I write all demos and blog posts in Markdown format and then use Eleventy to create static web pages.
But the ISSI reports contain sensitive data, like student email addresses and phone numbers, so it's not possible to secure this data with static pages.
This post describes how I created a simple Python app to add password protection to the reports. I relied heavily on ChatGPT for examples and to help when I got stuck.
Firewall setup
sudo ufw allow ssh    # port 22
sudo ufw allow http   # port 80
sudo ufw allow https  # port 443
sudo ufw allow 12121  # used for staging / development
sudo ufw enable
Firewall status
$ sudo ufw status
Status: active

To                         Action      From
--                         ------      ----
12121                      ALLOW       Anywhere
22/tcp                     ALLOW       Anywhere
443                        ALLOW       Anywhere
80/tcp                     ALLOW       Anywhere
12121 (v6)                 ALLOW       Anywhere (v6)
22/tcp (v6)                ALLOW       Anywhere (v6)
443 (v6)                   ALLOW       Anywhere (v6)
80/tcp (v6)                ALLOW       Anywhere (v6)
Install pre-requisites
I decided to use the mod_wsgi option to deploy this Flask app to production (see
below). This requried installing 2 packages:
sudo apt install libapache2-mod-wsgi-py3
sudo apt-get install apache2-dev
Here's the setup for the Python app itself:
mkdir -p /var/www/data.issisuzuki.org/app
cd /var/www/data.issisuzuki.org/app
python3 -m venv venv
source venv/bin/activate
pip install --upgrade pip
pip install mod_wsgi flask
Python app
Again with the help of ChatGPT, I created a Python app using the session option,
which will use a cookie to maintain session information for each client.
The app itself has a simple structure:
import json
from pathlib import Path
from flask import Flask, render_template, request, redirect, url_for, session, send_file

app = Flask(__name__, "/")
app.secret_key = b"abc123456"

CORRECT_PW = "abc123"

@app.route("/", methods=["GET", "POST"])
def login():
    if request.method == "POST":
        entered_password = request.form["password"]
        if entered_password == CORRECT_PW:
            # Password is correct, set session flag
            session["logged_in"] = True
            return redirect(url_for("home"))
        return "Incorrect password. Please try again."
    return render_template("login.html")

@app.route("/home")
def home():
    if "logged_in" in session:
        return send_file("reports/index.html")
    return redirect(url_for("login"))

@app.route("/logout")
def logout():
    if "logged_in" in session:
        session.pop("logged_in")
    return redirect(url_for("login"))
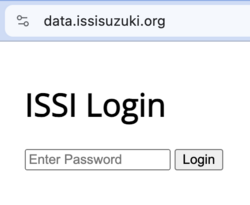
Contents of templates/login.html:
<!DOCTYPE html>
<html lang="en">
    <head>
        <meta charset="UTF-8">
        <meta name="viewport" content="width=device-width, initial-scale=1.0">
        <title>Login</title>

    </head>
    <body>
        <div class="main-column">
            <header>
                <h1>ISSI Login</h1>
            </header>
            <form action="/" method="post">
                <input type="password" name="password" placeholder="Enter Password">
                <button type="submit">Login</button>
            </form>
        </div>
    </body>
</html>
I created a unique endpoint for each report, with a similar structure to the /home
route shown above.
Configuring Apache to run mod_wsgi
I developed this application using Flask, and they have a nice description of production deployment options.
Since I setup this server using Apache, I opted for the mod_wsgi option.
However, the page only describes using 2 options for starting the server:
Normal user:
$ mod_wsgi-express start-server wsgi.py --processes 4 # as a normal user
Root user:
$ sudo /home/hello/.venv/bin/mod_wsgi-express start-server \
    /home/hello/wsgi.py \
    --user hello --group hello --port 80 --processes 4
Since I'm running 2 domains at this site, I needed to figure out how to use mod_wsgi
for the data.issisuzuki.org domain. With the help of ChatGPT and some trial and
error, I eventually made it work by modifying
/etc/apache2/sites-available/data.issisuzuki.org-le-ssl.conf as follows:
<IfModule mod_ssl.c>
<VirtualHost *:443>
    ServerAdmin webmaster@localhost
    ServerName data.issisuzuki.org

    DocumentRoot /var/www/data.issisuzuki.org/

    WSGIDaemonProcess dataapp threads=2
    WSGIScriptAlias / /var/www/data.issisuzuki.org/app.wsgi
    WSGIApplicationGroup %{GLOBAL}
    <Directory app>
        WSGIProcessGroup dataapp
        WSGIApplicationGroup %{GLOBAL}
        Order deny,allow
        Allow from all
    </Directory>

    ErrorLog ${APACHE_LOG_DIR}/flaskapp-error.log
    CustomLog ${APACHE_LOG_DIR}/flaskapp-access.log combined
Finally, the /var/www/data.issisuzuki.org/app.wsgi file is itself a Python script, but
it loads the virtual environment explicitly:
import os
import sys
import logging

sys.path.insert(0, '/var/www/data.issisuzuki.org/')
sys.path.insert(0, '/var/www/data.issisuzuki.org/venv/lib/python3.8/site-packages/')
os.chdir('/var/www/data.issisuzuki.org/')

# Set up logging
logging.basicConfig(stream=sys.stderr, level=logging.DEBUG)

# Import and run the Flask app
from app import app as application
I enabled the new Apache config file:
sudo a2dissite data.issisuzuki.org-le-ssl.conf
sudo a2ensite data.issisuzuki.org-le-ssl.conf
sudo systemctl reload apache2
Now loading https://data.issisuzuki.org/ requires the password in order to see reports: